I have been rearranging and organizing our basement. We have a finished basement and it is a good size but it is full of "stuff"!! The two boys have desks with computers on them and I moved them so that one half of the basement would be like a little family room with the couch, tv, and desks. It really looks good this way. So far anyway.... I wanted to personalize the space for the boys a little bit so I thought about making cork message boards to put above each desk. I had envisioned making them very personal to each kid but ended up making them the same and they match what I want the decor to be down there. First, I'll show you the boards and then I'll show you how I ended up making them more personal.
This is the starting cork board. I bought them from Wal-Mart for about $8 each and they are really big.
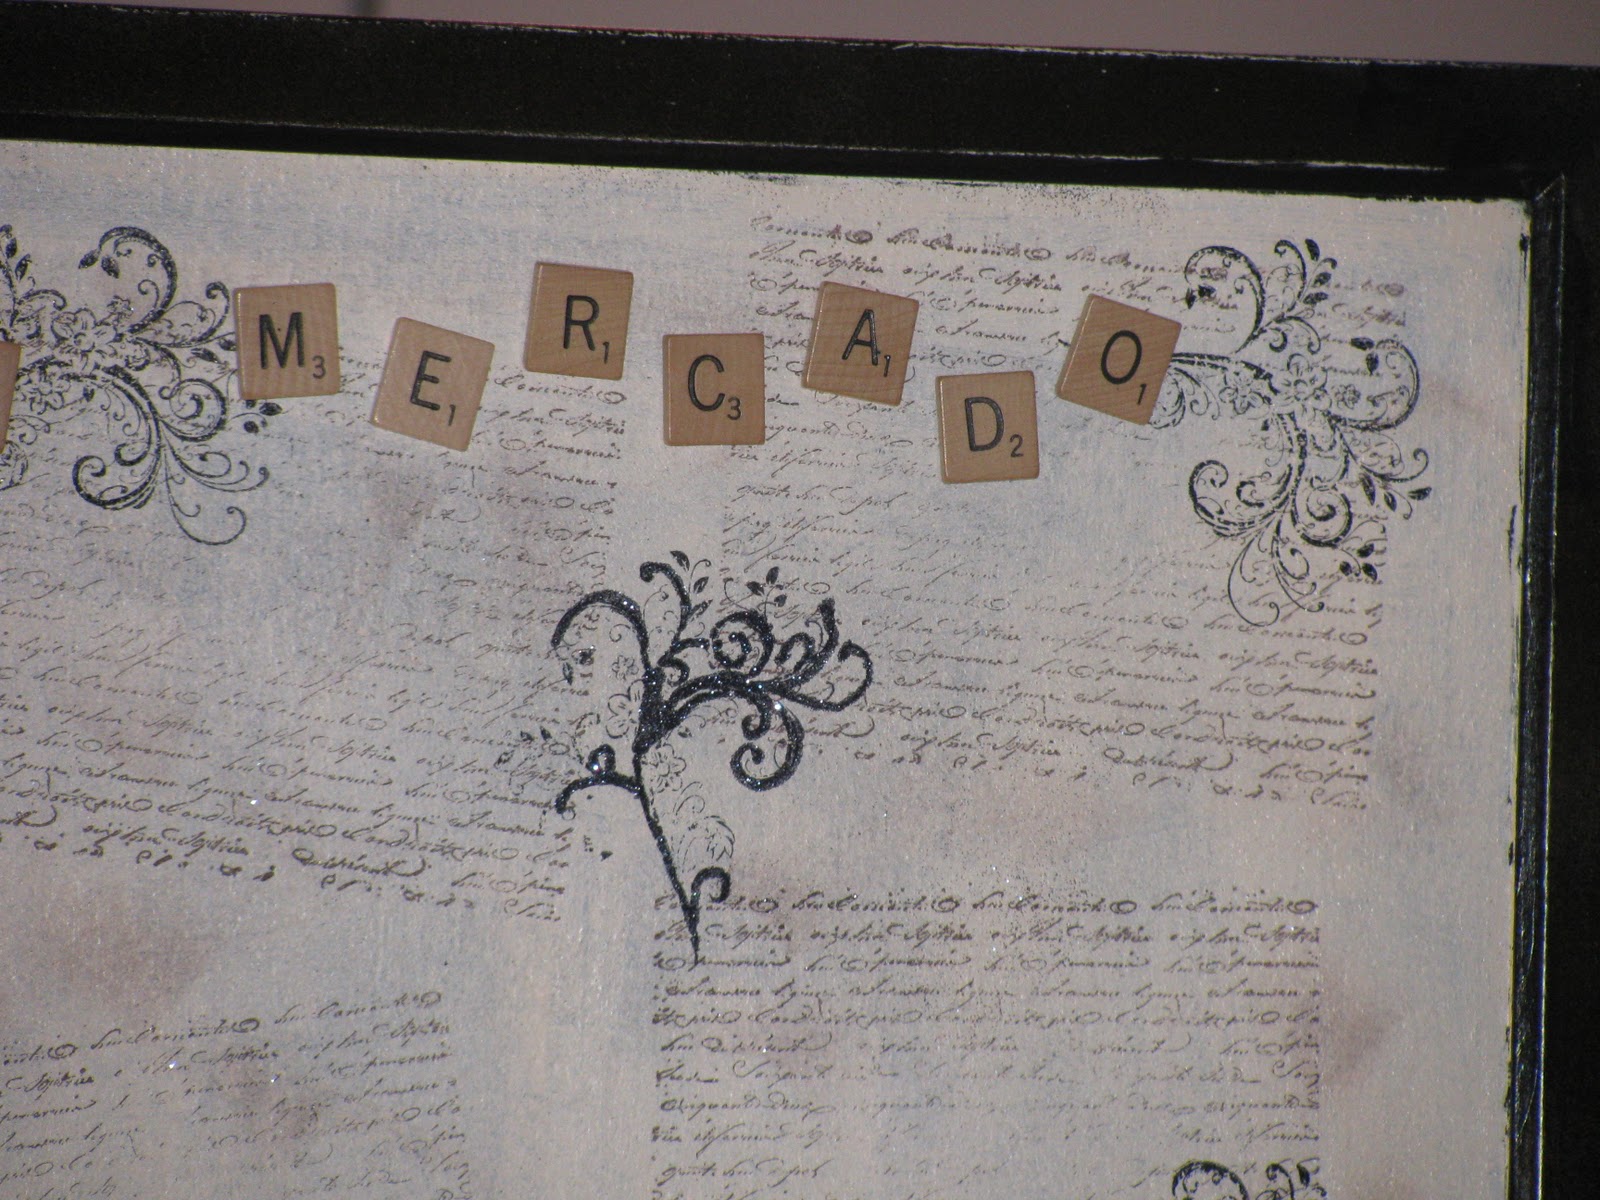
You can see on the second picture that I sanded the wood frame. After sanding the frame I painted a light base coat and then a dark top coat. When the frame was dry I lightly sanded random edges so that it would look distressed. It really worked well because the light color didn't sand away and really popped against the dark color. Next, I painted the cork a really light color - kind of a creamy linen color. I then stamped randomly with a script stamp in brown, a flourish stamp in black and then sponged brown all over to make it look a little bit aged. One of them I used a glue pen and put black glitter on the flourishes and the other I left plain. I prefer the plain one and kind of wish they were both like that. Live and learn, right? For the finishing touch I sprayed a clear gloss over the entire frame and cork board for protection against teenage boys (if that is possible?!?).

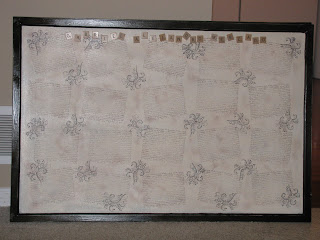

To add a little personalization I had a brilliant idea!! Lol! I took out my bag of Scrabble tiles and found letters to make each boy's full name. Boy, I gave those kids loooooong names!!! I had to take out my game that I keep to play with the complete the names! Now, I have to buy some replacement letters. It was worth it though. Gabe helped me find the letters and when we had everything we glued flat tacks to the backs of the tiles to make personalized pins! I used Crystal Effects for the glue because it will hold anything - it is super strong. We let it dry about an hour before we put then on the cork boards. Here are close-ups of the names. You'll see what I mean about the boys having really long names!!
If you want to make your own scrabble tile tacks I added a couple of close-up pictures so you can see what I did. They are super easy and super cute!!
I'm so proud! Weren't the Scrabble tiles a great idea? You could probably do that with anything!! Magnets on the backs would be really cute too. What do you think?


love it Kelly, you are so creative.
ReplyDeleteI could use one of these in my office, these look great, and I love the idea of the tacks made from scrabble pieces
ReplyDeleteThank you guys! I was thinking that they don't look very nice in the pictures (much better in person) so it was really nice to see your nice remarks!! :) -and that you read that whole long post!!!! Lol!
ReplyDeleteMaking pins of those tiles is really a great idea!
ReplyDeleteI have a bundle of extra scrabble games. You should dig through them next time you come over and take replacements.....my pleasure to donate to such a worthy cause.
ReplyDeleteYou are too wonderful!!
ReplyDeleteVery cool Kelly you are very creative.
ReplyDeleteJill